Run a workflow.
By the end of this page, you’ll have run a workflow from start to finish.
You can choose what you want to do first. If you have an audio clip you would like to turn to text we will walk through using that, if you want to summarise a PDF instead, we will also do that.
You will soon learn that the workflow is very easy to use. We have quite a few built in workflows, you can read about them here as well as guides on creating your own COMING SOON.
Tanuki Workspace
Section titled “Tanuki Workspace”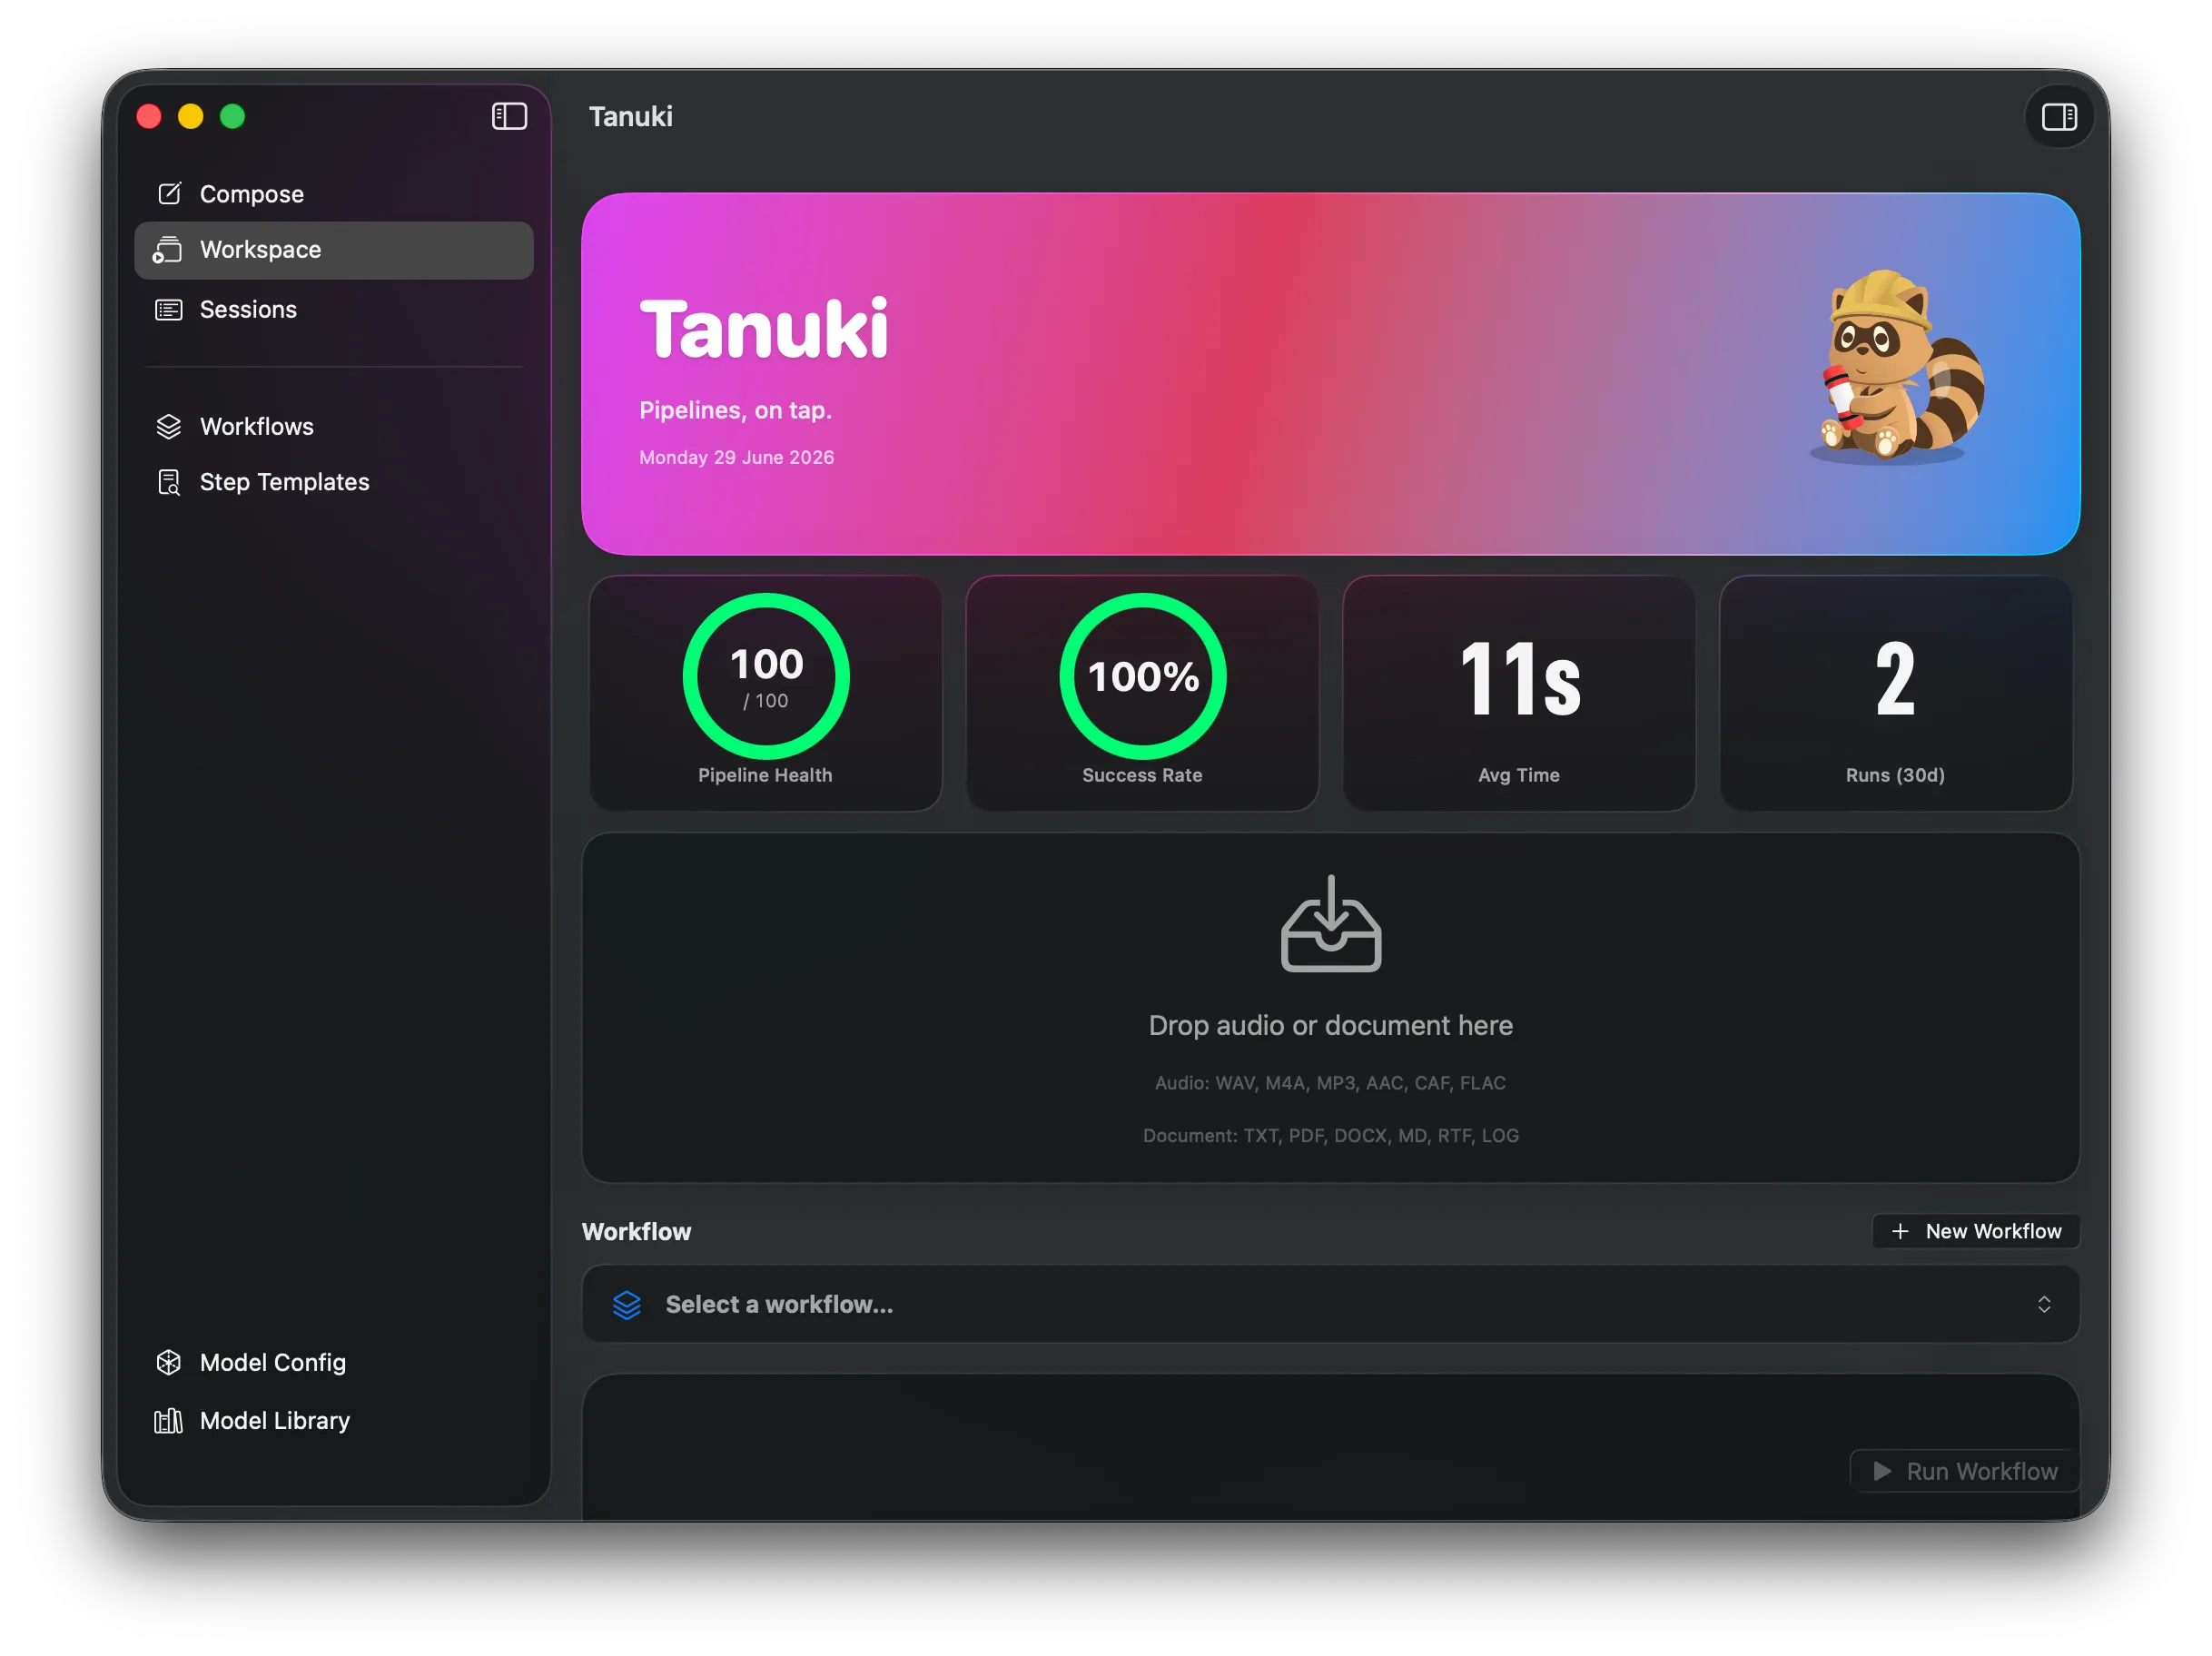
At the top of the page you see a stats banner, these statistics are either about all workflows, or the currently selected workflow.
Before choosing a workflow, drag either a voice recording or document onto the dropzone.
This will filter the Workflow list to present only workflows that are suitable for the given input type.
If you dropped in a voice recording, chose the Transcribe and Tidy workflow from the list below the dropzone.
If you dropped in a PDF/Word document, choose Summarise Document.
Run it
Section titled “Run it”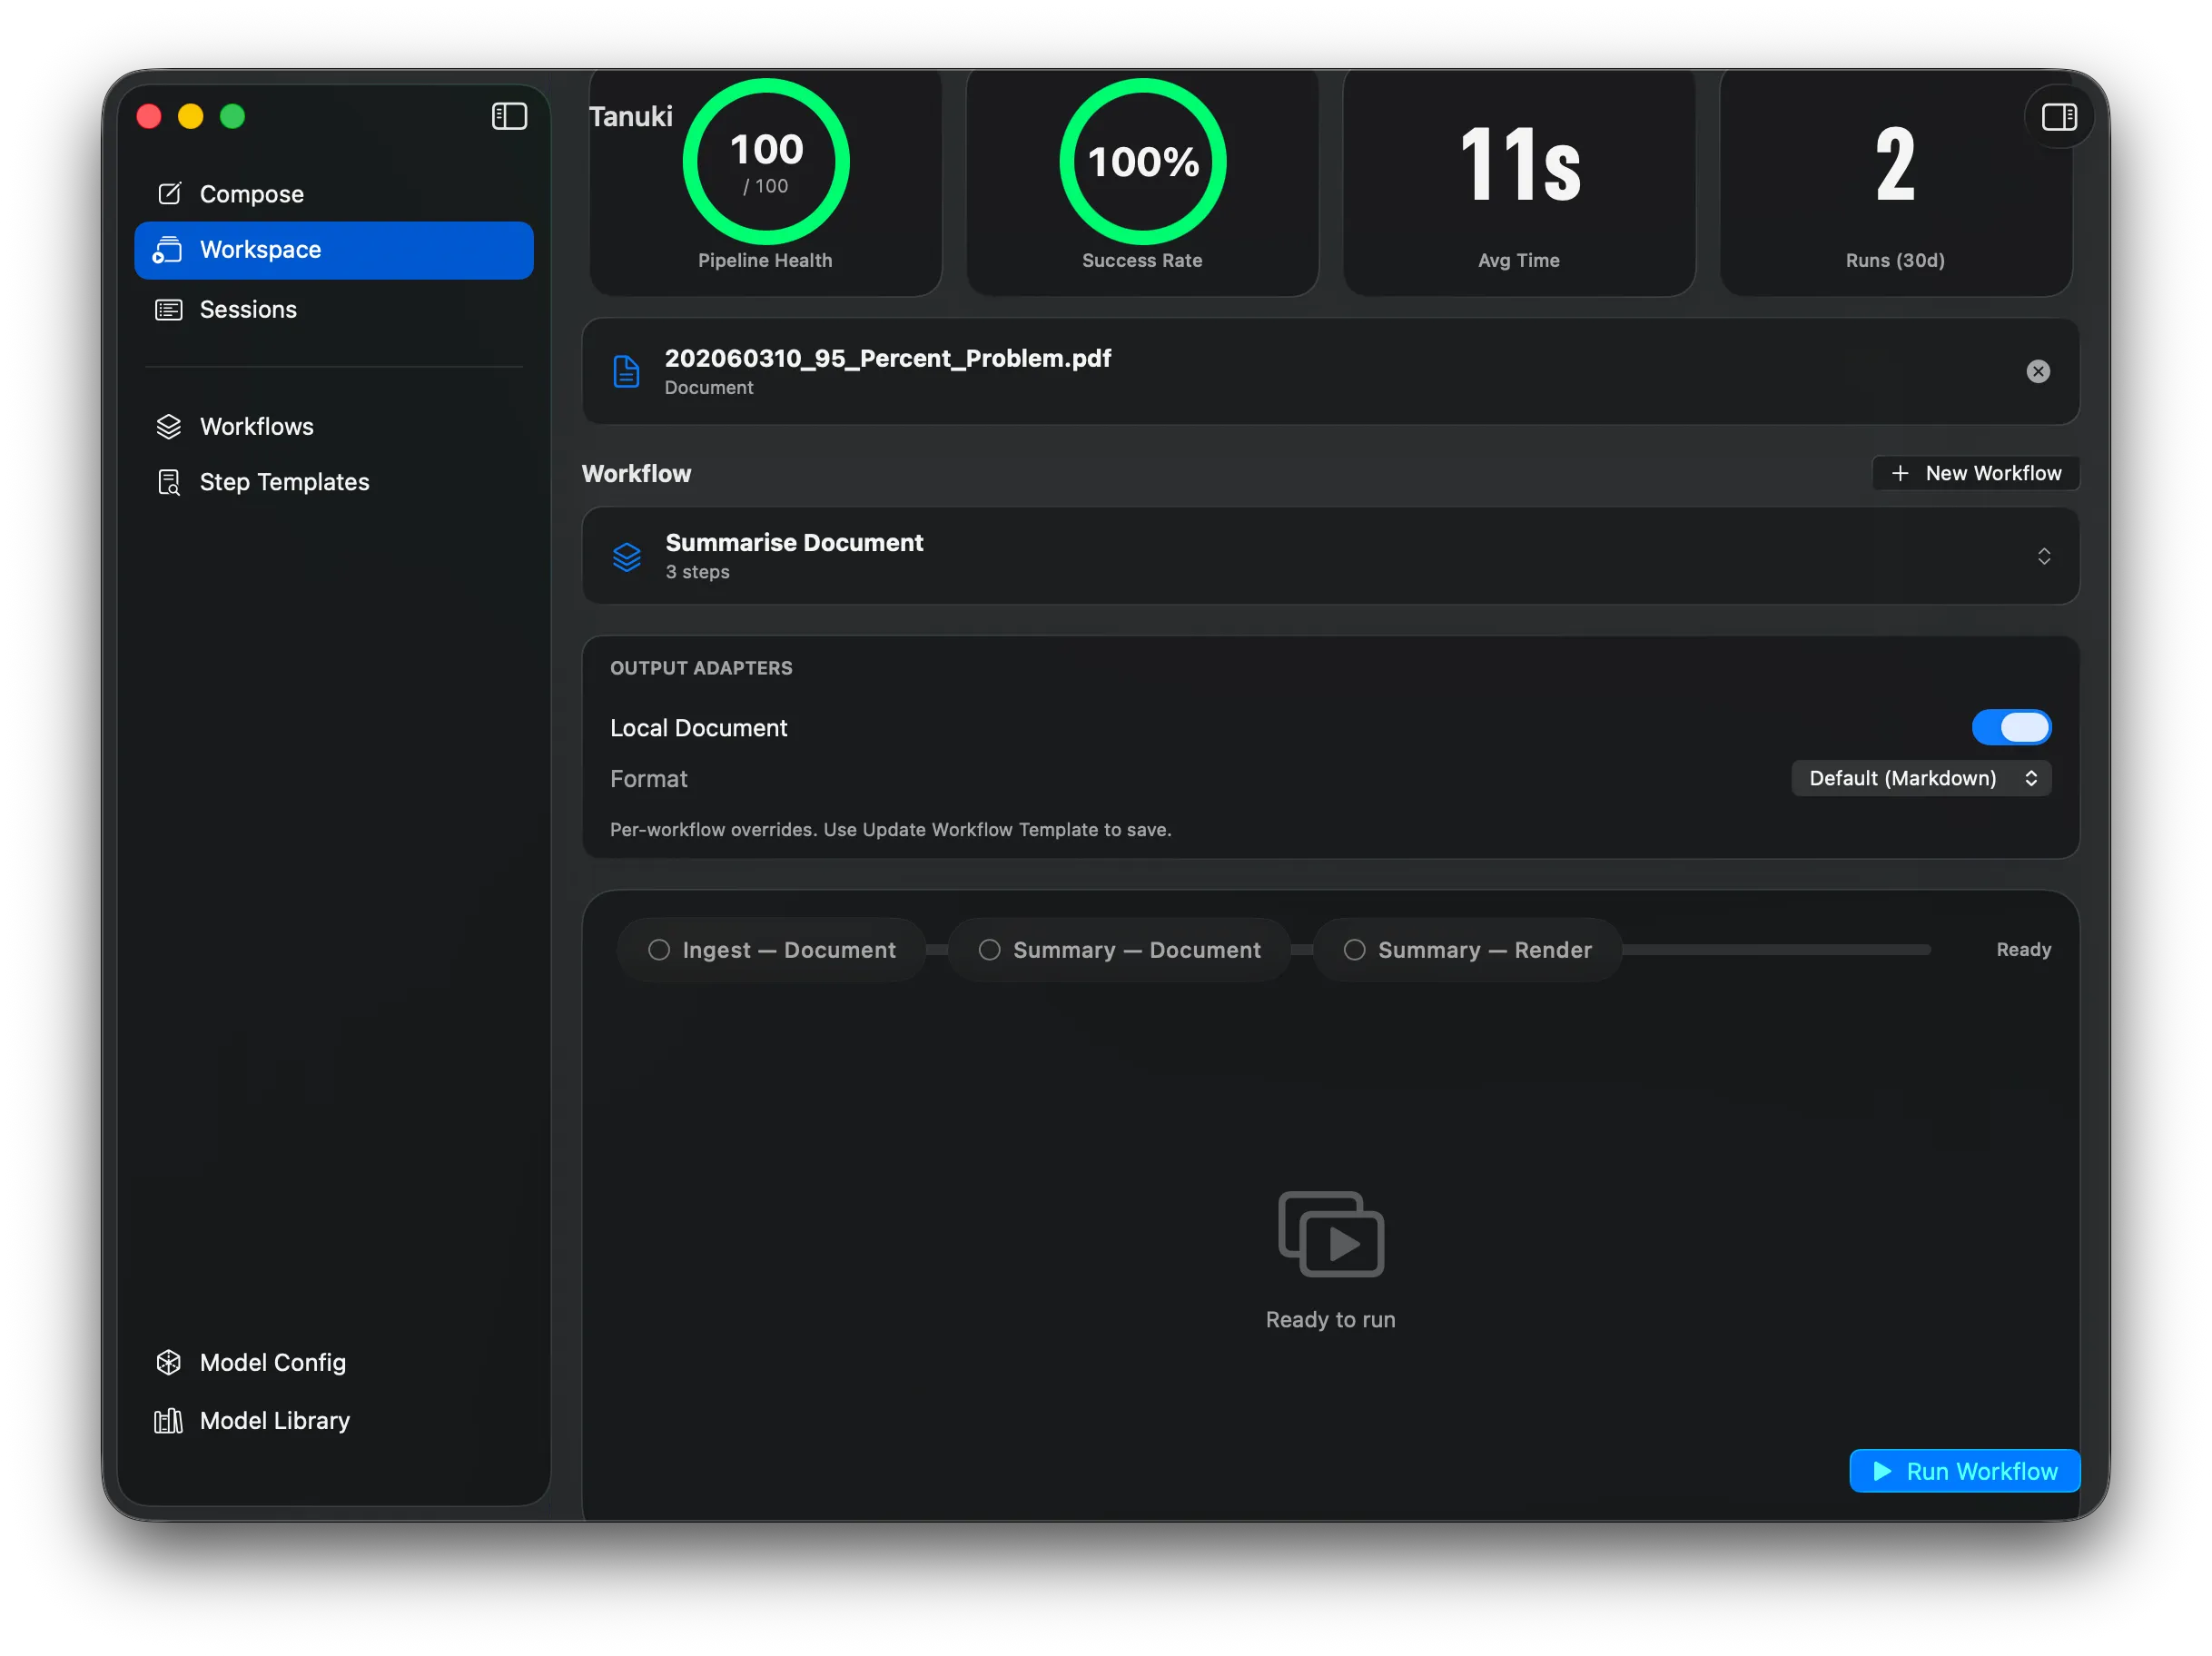
Now press run, you will see an indicator showing which step is operational. Once complete the output text will be visible in the lower segment of the page.
If you want to run the workflow again (advanced users will do this while tweaking workflow and model parameters), press reset to prepare to run again.
HERE.
You can now find the full detail of the run in the Sessions view, which is described here
Explore the How-to guides for specific tasks.